Monday, February 20, 2017

Ben Up, Up and Away

Lois here today with a card I made using one of the new Chloe and Ben die/stamp sets.  I decided that I wanted to make another card using the layout from last week's Sketch Challenge on Splitcoaststampers, using Ben Up, Up and Away.

Here is the layout from the challenge. . .


. . . and here is my card:


Supplies for my card are:

Red cardstock - 5 1/2" x 8 1/2", folded in half at 4 1/4", three small panels 1" x 1 1/4", scrap for label
White cardstock - three small panels 7/8" x 1 1/8", scraps for Ben and label
Red/white polka dot patterned paper - 5 1/4" x 4"
Scraps of blue, red, green cardstock for balloons
Ink - Memento Tuxedo Black and Lady Bug
Copic markers and White gel pen
Copic Colorless Blender
Word Window punch and Modern Label punch
Foam pop dots, tape runner
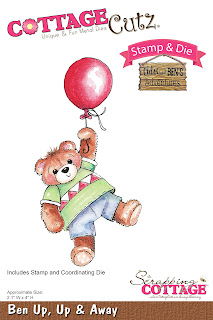
CottageCutz dies - Ben Up, Up and Away; Calendar Icons

To begin my card, I die-cut three balloons from the Calendar Icons die, coloring the strings with a black Copic marker.  I then stamped, colored and die-cut Ben.  A little hint for getting the "fuzzy" look to Ben's fur.  After coloring his fur (but before coloring anything else), squeeze a little bit of Colorless Blender onto a piece of terrycloth.  Gently dab it onto the fur.  This will remove some of the color in places, giving it an uneven look.  Should the ink bleed into the white areas, you can "repair" that by dabbing on the white gel pen after the ink is completely dry.  I had to do that around his feet.


After cutting the small red and white panels, I assembled them by gluing the white panels to the red panels and popping the balloons in the centers with the foam pop dots.


I stamped the sentiment onto the white scrap, punched it out with the Word Window punch (as well as punching out the Modern Label from red cardstock) then assembled my card, using the layout as my guide.  It went together quite quickly.  Here again is my completed card.


The CottageCutz dies used on my card are:


Sunday, February 19, 2017

Daisies Flower - April

Hello everyone!

It's Donna here sharing with you another one of the stamp & die combo set. I am featuring one of the new Birthday Flowers sets. This one is the Daisies Flower - April set. This set has two stamps, the flower and the bumble bee.   Please take some time to browse around on the blog, there are some very creative projects using the birthday flower stamp & die combos.

Here is my card, my card is an A2 (4 1/4 x 5 1/2)


Here is a closer look:


 I stamped the image from the Daisies Flower with memento ink and colored it with copics.


I then centered the dies from the Daisies Flower - April set and die cut them with my big shot.


This is how the flowers look when it is die cut.  I then sponged some light blue ink on the Stitched Oval die and used foam tape to pop the daisy image on it.  I then added it to my card.

I used these copics to color all the elements on the flower and bee.

To finish the card, I added the "April" word from the Calendar Month die set.


Dies I used:


Saturday, February 18, 2017

Flowers of Love


Hello Scrapping Cottage friends! Thanks for taking the time to stop and visit today. It's Mary Marsh here bringing you the Saturday edition of the Blog.

We have some fabulous new Spring dies released over at the online store. Today for your viewing pleasure I am featuring Wildflowers 1, Wildflowers 2 and Wildflowers 3 dies. So let's get started on how I created my card.

Navy Blue Card Base: 5 1/2" x 4 1/4"
Patterned Paper Panel: 5 3/8" x 4 1/8"
Navy Blue Rectangle Panel: 2 3/4" x 3 3/4" (2nd largest of rectangle dies)

My choice of colors for my card today came from the Splitcoaststampers color challenge #622. Those colors are mint, watermelon and navy blue. And then I chose my background navy patterned paper. From there I decided on a card layout and cut the necessary pieces.

The circles are from the CottageCutz circle and stitched circle dies. Both are the 4th largest dies in the sets. The navy blue rectangle is from the 2nd largest rectangle die in this set.
I cut the wildflowers in the watermelon shade of the color challenge. And the dragonfly in the mint shade also from the challenge. When I started the assembling of my card, I decided to use the Wildflowers 3 die and eliminate the 2 die cuts from Wildflowers 1.
I decided to add a mint strip across my card and top that with some navy blue ribbon. I also stamped my sentiment on the white circle in navy ink. I used an embossing folder to add some texture to the mint panel.
I was now ready to start the assembly of my card. On the large panels I used double sided tape. On the wildflowers I used Ranger multi-matte medium. The wildflower dies have great detail as you can see in this close up photo. On the sentiment circle I also added some watermelon circles.
 
Well that's it for me for this week. I hope I have given you an additional idea on how to use the Wildflower dies. I will be posting again on Wednesday with another idea for using the Wildflowers.  So until then..........
 
 
http://www.scrappingcottage.com/cottagecutzwildflowers1.aspx
 
http://www.scrappingcottage.com/cottagecutzwildflowers2.aspx
 
http://www.scrappingcottage.com/cottagecutzwildflowers3.aspx
 
http://www.scrappingcottage.com/cottagecutzrectanglesetbasics.aspx

http://www.scrappingcottage.com/cottagecutzcirclesetbasics.aspx

http://www.scrappingcottage.com/cottagecutzstitchedcirclesetbasics.aspx


Friday, February 17, 2017

MINI ACCORDION PHOTO BOOK

Hello Dear Friends !!!

It's Anita here and I hope you had a great week. Spring is in the air and birds and bees are to be seen in the gardens.
CottageCutz has something new for you this season and that is the combination of stamps and dies that will surely make you happy. These are super cute and so much fun to colour.
You can check all of them here.
Valentine's Day just got over but a gift for our loved ones is what we all love making.
So here I have a cute mini accordion photo book featuring the CottageCutz Sweet Valentines stamp and Die set.


To make this book, follow the pictures and instructions below.
  

Stamp the image with black ink

Colour with medium of your choice. I have used Zig Brush Pens


Cut them out with coordinating dies


Cut two card stock 12" x 5" and score in mountain and valley fold at 4".


Adhere the last panel of one card stock to the first panel of the other card stock to form an accordion book.


Cut out pattern paper 4.75" x 3.75" and round of corners. Distress with aged mahogany distress ink.

Adhere these panels to the front and back of the book. Adhere Wide Stitched Rectangle frames after they also have been distressed.

Add the die cut images popping them up with 3D foam tape


Tie the book with a ribbon.


CottageCutz dies


Its so much fun to create cute projects using this stamp and die combination. To see many new dies , visit the store here.
Thank you so much for your time and comments. Happy crafting.

Tuesday, February 14, 2017

Spring fairy

Hi, Janja here!

Today I share with you another spring card.


CottageCutz dies: Spring Fairy, Wildflowers 1, Wildflowers 3, Wildflowers 4, Build An Easter Egg

Supplies:
- white card base: 5.3 x 5.3" (13,5 x 13,5 cm), folded
- purple paper: 4.4 x 4.4" (11,2 x 11,2 cm)
- white cardstock: 5.1 x 5.1" (13 x 13 cm)
- fun foam
- white cardstock

Trim purple paper and prepare cutouts with dies from white cardstock.


Fasten all cutouts. Use glue and self-adhesive foam pads.
 

Cut two squares with a paper cutter. One from a white cardstock and another from fun foam. Cut out a square 0.6" (1,5 cm) from the outer edge to get the frame. Interior dimensions are 3.9 x 3.9" (10 x 10 cm).
From purple paper cut out a thinner frame with external dimensions of 4.6 x 4.6" (11,7 x 11,7 cm).
Beautiful bow is cut out by the die - Build an Easter Egg. 


Glue frames to each other and attach a bow in the upper left corner.

Complete the card.


Thank you for coming over and see you next Tuesday.