Friday, November 25, 2016

A Floral Fantasy with Anita Kejriwal

Hello everyone !!!!
It's Anita here. I wish you all a very Happy Thanksgiving to all. I feel blessed to be a part of the CottageCutz family and thanks for believing in my creations.

We at CottageCutz have the biggest sale of the year and have fabulous discounts store wide. Check it out here.


And we also have a new Black Friday Release. It's all about camping and forest friends. You can find them here.

Now on to some more beautiful inspiration from CottageCutz.

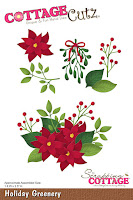
Here is my card with some 3D flowers and I have a video as to how I made these flowers. 


Do Check out my video on creating these flowers.


Do leave your comments. Have a great day !!!


Tuesday, November 22, 2016

Autumn leaves

Hi, Janja here!

In a sunny autumn afternoon during a walk in a nearby forest, one hears only rustling of leaves beneath the feet. Under the impression of beautiful colors that flow on autumn leaves, I created this card.


For the card we need:
- white card base: 5.3 x 5.3" (13,5 x 13,5 cm)
- patterned paper: 5 x 5" (12,7 x 12,7 cm)
- white and color cardstock
- Distress ink: Scattered Straw, Spiced Marmalade, Mowed Lawn, Peeled Paint, Vintage Photo
- Memento ink: Desert Sand

Slightly shadow patterned paper with distress ink and stamp text.


With dies - give thanks and cornucopia cut out the most of oak leaves and acorns. Also cut out branches with winter branches die. Shadow all the pieces with distress inks.


For a hedgehog use forest critters die. At the end stamp " Thinking of you".


 Thank you for coming over and have a great day. 


Monday, November 21, 2016

Christmas Wreath and Greetings


Hello everyone !!!
It's Anita here.
I hope you all had a super exciting weekend. Black Friday is just around the corner and everyone is geared up for the super sale.
We , at CottageCutz have an amazing array of dies for wonderful Christmas Craft.You can check them out here and here.

I have a pretty traditional Christmas card with Greetings and Wreath .
Check it out here.


The finished card measures 7" by 5".
1.On the red card base, adhere a plaid pattern paper measuring 4" by 6" with 3d foam tape. Cut the corners with Crop a dile.
2. Then cut out the 4 die cuts in white card stock with CottageCutz Fancy Floral Corner #2 and paste the sides together to form a doily. Adhere the doily to the centre of the pattern paper.
3. Wrap a brown twine 7-8 times around a circle and adhere on the card front. This forms the base for the wreath.
4. Cut die cuts in green card stock from CottageCutz Holiday Wreath and arrange on the twine. Add a few berries cut from red paper from CottageCutz Autumn Foliage . Add a few red blings here and there.
5. Cut a die cut from CottageCutz Stitched Circle set and stamp the Christmas sentiment. Adhere in the center of wreath.
6. Add a bow cut from CottageCutz Double Bow.

Products used.


Do leave your comments and feedback. I love reading them.


Sunday, November 20, 2016

Season's Greetings


Hello everyone,

Can you believe it is almost the end of November!  Is everyone ready for Thanksgiving?  Do you have any special plans?  My plans are to spend the holiday with my family and eat plenty of good food!  I wish all of you a Happy Thanksgiving and enjoy your family and friends!

It's Donna here and I am back again featuring some of the new release stamps by Peachy Keen Stamps.  The Peachy Keen Stamps work perfectly with the CottageCutz Christmas ornament dies. CottageCutz has several different shape ornament dies in the store, be sure to go over and check them out!  Did you know Peachy Keen stamps all have a tint of pink symbolizing the "Peach"?  They have been around since 2003 featuring their whimpsical face stamps.  They are just the cutest ever and I have really enjoyed working with them.  

 I am using the Candy Cane 1 7/8th Face Set and the Candy Cane 1 1/8th Face Set.  Here is my card:


Closer look at the card.

Here is how I put my card together:
  • The card is an A2 card 4 1/4 x 5 1/2,
  • The red and white stripe design paper is the same size as the base of the card, 
  • The red solid piece is cut from the CottageCutz Double Stitched Rectangle Set,
  • I cut all the elements that I wanted to put on my card:

  • I cut the small and medium nested ornaments bulb,
  • I then used my Misti to stamp on the faces on the bulb ornaments,
  • I added all the elements to my card,
  • I finished it off by adding the red bling to give the bulbs some dimentsion.
Thank you so much for stopping by, please come back again soon!

Dies and stamps used:


Saturday, November 19, 2016

Mistletoe Christmas Card

Hello Scrapping Cottage friends! Thanks for taking the time to stop and visit today. It's Mary Marsh here bringing you the Saturday edition of the Blog.

This upcoming week we are celebrating Thanksgiving here in the USA and then comes the frantic Christmas rush (lol)!!! Card making, gift buying and wrapping, baking and decorating will be in the forefront for the month of December.

So if you haven't started your cards as yet, I am showing one today that could very easily be mass produced. You could change it up by simply using a different patterned paper.

So let's get started on some details of how I created my "Mistletoe Christmas" card. My mistletoe is from the Holiday Greenery die. It was part of the Christmas 2 release.

Green Card Base: 4 1/4" x 5 1/2" (A2 size)
Red Layer: 4 1/8" x 5 3/8"
Patterned Paper Layer: 3 7/8" x 5 1/8"
Image Panel: 2 1/2" x 2 1/2"
Black layering Panel: 2 3/4" x 2 3/4"

Step 1: I started my card this week by choosing my patterned paper. Once I did that, I just matched my cardstock to the colors used on the patterned paper.
Step 2: Cut my first 3 layers of cardstock to the above sizes and assembled using double sided tape. I decided to add some red seam binding just for added card interest.  No bow because I want to keep the card flat for mailing.
 
Step 3: I cut my image panel using the basic square in vanilla and the stitched square in black. There is black in this patterned paper so I used that cardstock to help accent my card. I stamped my sentiment and added some dots cut from the holiday greenery die. I used dimensional tape on this panel to lift it away from the patterned panel.
 
That completes my card for this week. As I said, this one could be mass produced easily. And, that would free you up to do other Christmas tasks. Here is another look at the completed card.
Well Blogger friends, that's it for me fo this week so until next time.......inky hugs.
 
http://www.scrappingcottage.com/search.aspx?find=square+set
http://www.scrappingcottage.com/cottagecutzstitchedsquaresetbasics.aspx
 
http://www.scrappingcottage.com/cottagecutzholidaygreenery.aspx


Thursday, November 17, 2016

Pink Cockatoo

Hi, Lois here with a happy card today.  It is almost Thanksgiving, and the weather here in Florida is still quite warm -- which is fine by me.  I thought I would make a tropical-looking card to brighten the day, using one of the In the Forest dies from CottageCutz -- Forest Bird.


Supplies needed for this card:

Blue cardstock cut 8 1/2" x 5 1/2" folded in half, and 3 1/4" square
White cardstock cut 4" x 5 1/4" plus another piece approximately 3 1/2" square to be die cut
Scraps of cardstock - pink, gray, green, wood grain patterned paper
Wood grain patterned paper strip 1 1/8" x 3"
Cloud embossing folder
Pastel chalks - light blue
Distress inks - Worn Lipstick, Weathered Wood
Sequins
Dies - CottageCutz Forest Bird and Double-stitched Square

I Googled "cockatoo" and really liked the pink/gray one, which is called a Galah and can be found in open country in most parts of Australia.  There's your geography lesson for the day. 

Meanwhile, back in the craft room, to start your card you should cut your pieces out in the various colors.


Sponge with distress ink as desired.


Cut the card base and layering pieces.


Emboss the large white piece with the cloud embossing folder.  Sorry that it is a little hard to see the embossing.


Using the pastels, color in the sky on the embossed piece.


Then construct your card as shown, adding the three sequins to the background.  Here again is my finished card.  I attached the small pieces in two ways.  The bird, wings and tail, and branch I ran through a Xyron X sticker maker.  The other small pieces are attached using Glue Dots micro dots, as are the sequins.


Dies used on this card is: