
We are having a HUGE LABOR DAY SALE going on right now -- save up to 65%! Great time to stock up on your favorite basic dies or nab some of the uber CUTE CottageCutz dies... even the Li'l Bluebird stamps/dies are on sale!!
Hello ~ Kris here to share some MOO-velous Monday inspiration with you!

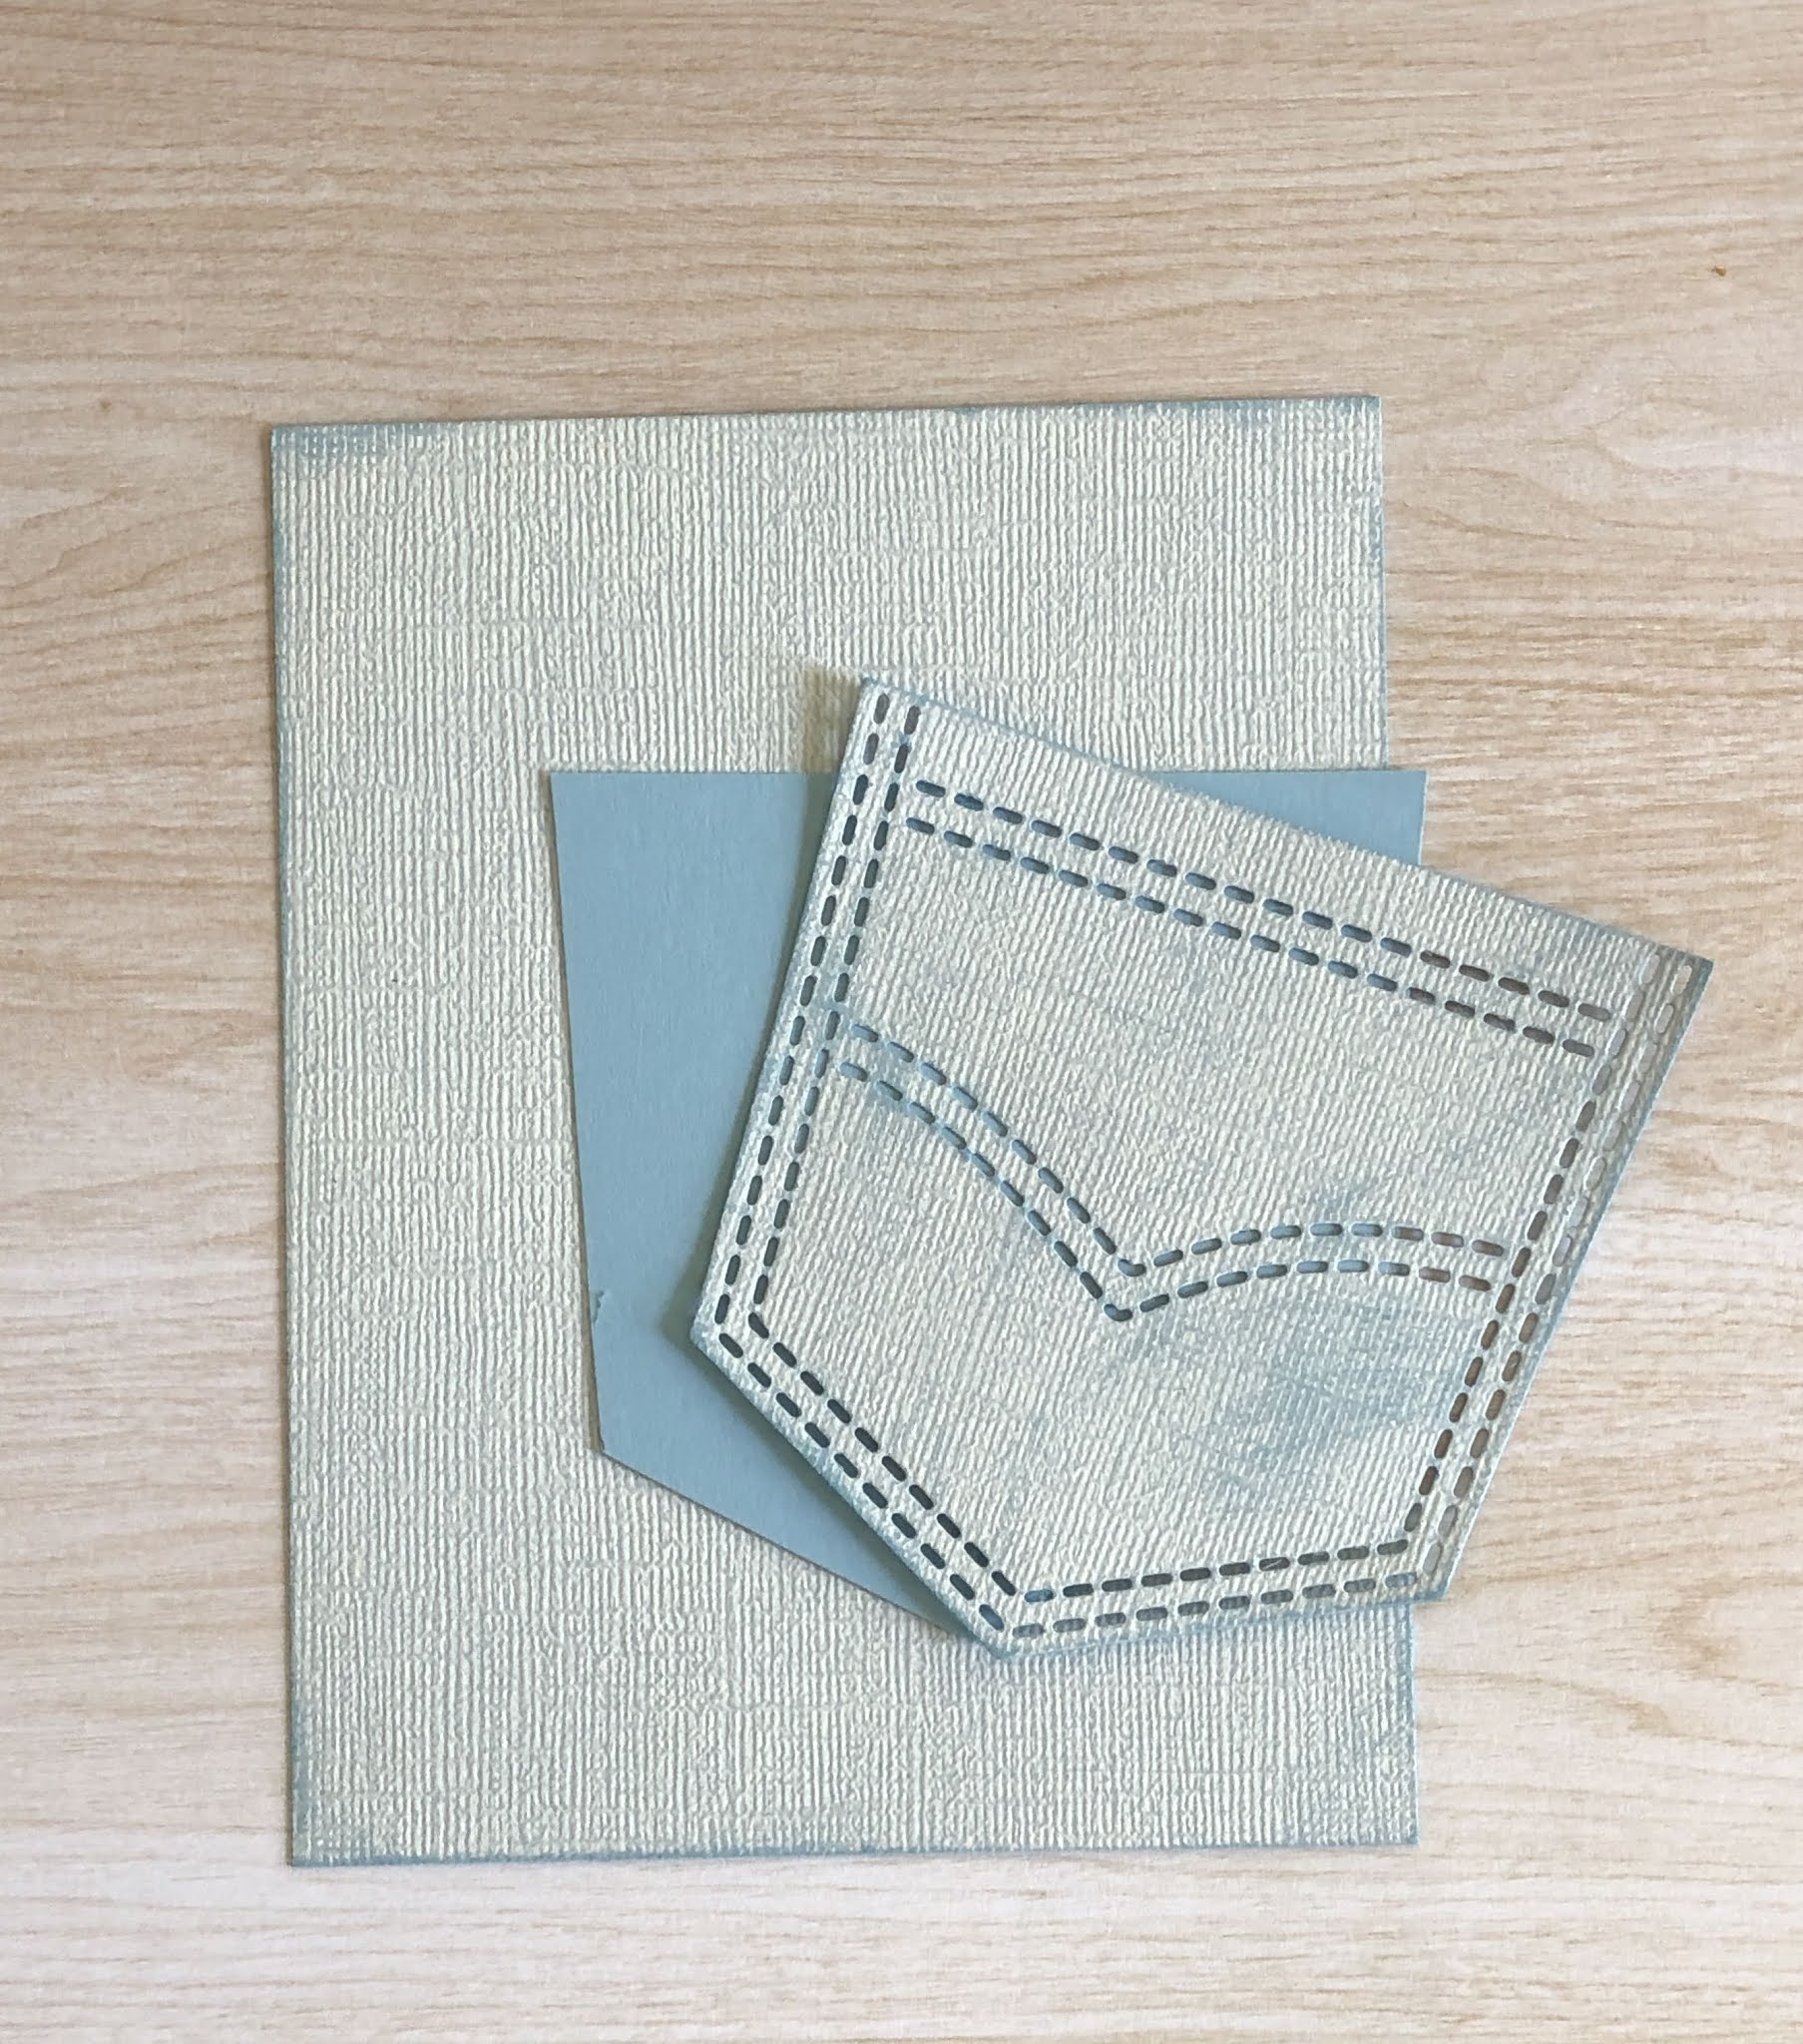
Have you seen these adorable pocket peekers?! I've used this cute Farm Cow Peeker, and the Peeker Pocket along with the Hello w/ Shadow die.
I've used the Splitcoast Stampers Color Challenge #964 for this week which is
Copper Clay
Moody Mauve
Misty Moonlight

The colors in my photos below do look a bit off from the color challenge, but I did use Misty Moonlight for my card base, and I substituted Pecan Pie for the Copper Clay.
DESIGN STEPS:
I cut my card base at 6" x 8-1/2" and scored at 4-1/4" for a side-folding card.
I used another piece of MM cardstock and stamped a denim looking background stamp onto it with some grey ink (as I didn't have the Misty Moonlight ink and it gave it a more subtle effect). Then I die cut it using the Peeker Pocket.
To back my pocket and to resemble the brown/tan stitching on jeans, I put a piece of Pecan Pie c.s. behind the pocket and cut it slightly smaller and then glued it behind the denim one.

I cut a piece of patterned paper (from the SU! Earthen Elegance pack as it reminded me of a sort of rustic cowboy print) at 5-3/4" x 4"and adhered to card front.
I cut a piece of Pecan Pie ginham (from the Glorious Ginghams pack) at 5-3/8" x 3-5/8" and adhered to card front.
Next, I punched 2 small holes at top of pocket and added some rustic metal brads, then glued the sides and bottom of pocket to the lower gingham layer.

I die cut my Farm Cow Peeker from White, Sand, and Pecan Pie and then I cut small pieces of the Moody Mauve, Blackberry Bliss, and Mossy Meadow and die cut just the flowers and leaves.

I added some coloring/shading with Distress Oxide inks and Copic markers and added white highlights on flowers & eyes with a white gel pen. Then I assembled the cute cow with glue and tucked her head/body behind the pocket and her legs on top.

How stinkin' adorable is she?! ☺

I had this li'l buckle with some engraved detail and some braided twine that I thought would be cool on here, so I attached it with some double-sided tape behind the cow's head.

And lastly, I die cut a 'Hello' from the Moody Mauve c.s. and adhered to the pocket.
Thanks for taking a PEEK! Go check out these adorable PEEKERS and grab your favorites or take advantage of this AWESOME LABOR DAY SALE going on to stock up!!


