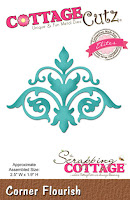
Showing posts with label Corner Flourish. Show all posts

Sunday, October 01, 2023

Father Christmas (New Die)

Hello CottageCutz friends! Thanks for taking the time to stop and visit with us today. It's Mary Marsh here bringing you the Saturday edition of the Blog.

It's new release time!!! We have our Christmas 2023 release in the online store that has 40 designs. It's an old-fashioned Christmas theme. You can pick up the bundle at 50% off or the individual dies at 30% off for a limited time.

We also have a new Fall 2023 release in the online store with 15 designs. You can pick up the bundle at 50% off or the individual dies at 30% off for a limited time.

Today for your viewing pleasure, I am featuring the new Father Christmas die. I have a collection of vintage Santa images that my mother-in-law passed along to me and this die reminds me of those images. I may just send this card to her for Christmas. So, let's get started with some details of how I created my card.

Design Steps:

I started by selecting the designer papers I wanted to use for my layout. I have an older Christmas pack that had the name of Father Christmas. It contains vintage designs. I picked 2 different patterns and cut them as the background for my image.

Light Green Card Base: 4 1/2" x 5 1/2"
Light Green Image Panel: 3 1/8" x 4 1/8" (I used the largest rectangle die)
Dark Green Layering Panel: 3 1/2:" x 4 1/2"
 
 Next, I cut the Father Christmas image. I used the colors from the packaging as they coordinated well with my designer paper. I wanted a more vintage look to my card so I cut the bow from the Vintage Holiday Lantern die and also used the Corner Flourish die (2016 release) for another corner accent. 
I decided a stamped sentiment would work best for my layout. I stamped in a cherry ink that matches the ribbon and other embellishments on my card. 
Now I am ready to start attaching the panels and the images. I used double sided tape and clear drying glue. 
Next, I secured the Fathe Christmas images with dimensional adhesive. I wanted him lifted off the card slightly. 
I wanted some other embellishment on my card since the vintage style is always a bit busy. So I decided to use one of the images from the new Christmas Ornament die. I think it works well with the other images. 
And that completes my card for this week. I hope I have given you an idea for a way to use the Father Christmas die. See you on Wednesday. We are having a group post featuring the new Fall designs

Reminder: Marla has a new video up on our YouTube channel. There is a giveaway. Click here


Saturday, July 22, 2017

~ Bride & Groom ~ (new die)

Hello Scrapping Cottage friends! Thanks for taking the time to stop and visit today. It's Mary Marsh here bringing you the Saturday edition of the Blog.

Have you had an opportunity to visit the online store to see the new dies that have been released? There are 20 new wedding dies and 17 fun new nesting shapes.  They are currently on a limited time 25% off sale.

Today, I am featuring the new Garden Bride & Groom die as well as the new nested Stitched Scallop Rectangle die.
I have a wedding to attend soon and this die is perfect. I like the elegant appeal of this silhouette image. So I created a card a bit more on the clean and simple side to keep the bride & groom die cut as the central focus.

So let's get started with some details on how I created my card.
Step 1: When I make wedding cards, I usually choose the colors the bride has chosen for her wedding. In this case, it's a rich denim blue and a soft pink. I cut the scallop frame in the denim and then the bride & groom in white. I used the largest of the scalloped rectangle dies for my frame.
Step 2: I decided to stamp my sentiment on the card base before I placed any of the card elements. Used my stamp-a-ma-jig to help with the placement and to keep it straight. I stamped in the denim ink. I thought this sentiment worked so well with this bride & groom image.
Step 3: As I thought of ways to incorporate the pink into my card, I decided to use some ribbon. It dresses up a card nicely and adds interest. My card base is a little larger than what I usually do.
Card Base: 5 7/8" x 4 3/4"
Step 4: Attached the bride and groom to the scalloped frame with double sided tape. Once that was placed I die cut the corner flourish. I cut them first in white but it just didn't have enough pop. Once I tried the denim blue I liked the look. I used the corner flourish die. Attached the flourishes with mini glue dots.

Step 5: Finished off my card by adding a couple of pink hearts cut from the new Mr. & Mrs. die
Well that's it for me for this post. I hope I have given you an idea on a way to use these new dies. Remember, for a limited time you can save 25% on the new dies.
 
dies I used to create card:
http://www.scrappingcottage.com/cottagecutzgardenbrideandgroomelites.aspx

http://www.scrappingcottage.com/cottagecutznestedscalloprectangleset.aspx

http://www.scrappingcottage.com/cottagecutzcornerflourishelites.aspx
http://www.scrappingcottage.com/cottagecutzmrandmrswithhearts.aspx


Wednesday, May 11, 2016

Thinking of You


Hello Scrapping Cottage Friends! Thanks for taking the time to stop and visit today. It's Mary Marsh here bringing you the Wednesday edition of the Blog. 

Today for your viewing pleasure, I am featuring another of the April release dies. This time it's the Corner Flourish Elite die. I paired it up with the Mushroom & Flowers die to create a thinking of you card.
My card this week started with a sketch and from there I chose my patterned paper and coordinating cardstock. There are many sketch blogs on the internet and this time I chose the MojoMonday sketch for my layout.
 
When you work with a sketch you don't have to follow it exactly. For instance, instead of the corner circles I used the corner flourish die. Let's get started with some more details on how I created my card. I hear card makers say that they struggle with card layouts. That's why I look for a sketch to help the process along. It just helps to get the creative juices flowing.
Cardstock and Patterned Paper Measurements:
  •  soft suede base measures 4 1/4" x 11" and scored at 5 1/2"
  • patterned paper measure 4 1/8" x 5 3/8"
  • tilted panel is cut with the CottageCutz square set. I used the largest one 3 1/2" x 3 1/2"
  • rectangle patterned paper is 1 1/2" x 4 1/8". Daffodil satin ribbon is 5/8" wide.
  • vanilla rectangle panel is 3 1/2" x 2 1/2"
For assembly: I die cut the corner flourishes in a light blue cardstock and attached with multi medium matte. I like this adhesive because it dries clear. I think the flourishes add an elegant touch to the card.
On the image panel, I used the flower from the mushroom & flowers set and cut in daffodil cardstock. I love the detail on The CottageCutz dies as well as the additional pieces that come with them. For instance, I was able to cut the pistil in the soft suede color for some great contrast. I am not a gardener, that duty falls to my hubby, but I think that's what this part of the flower is called (lol)!!!
For the sentiment, I used the thinking of you die and cut in the soft suede cardstock. I also used the multi medium matte to adhere the words. I scattered a few sequins and that completes my card for this week.
See you again next Wednesday Blogger friends! Until next time......inky hugs. If you have any questions about what I have created just ask. I will get back to you with an answer.


http://www.scrappingcottage.com/cottagecutzsquaresetbasics.aspx
http://www.scrappingcottage.com/cottagecutzmushroomandflowers4x4pre-order.aspx
http://www.scrappingcottage.com/cottagecutzcornerflourishelites.aspx
http://www.scrappingcottage.com/cottagecutzexpressionsthinkingofyou.aspx